
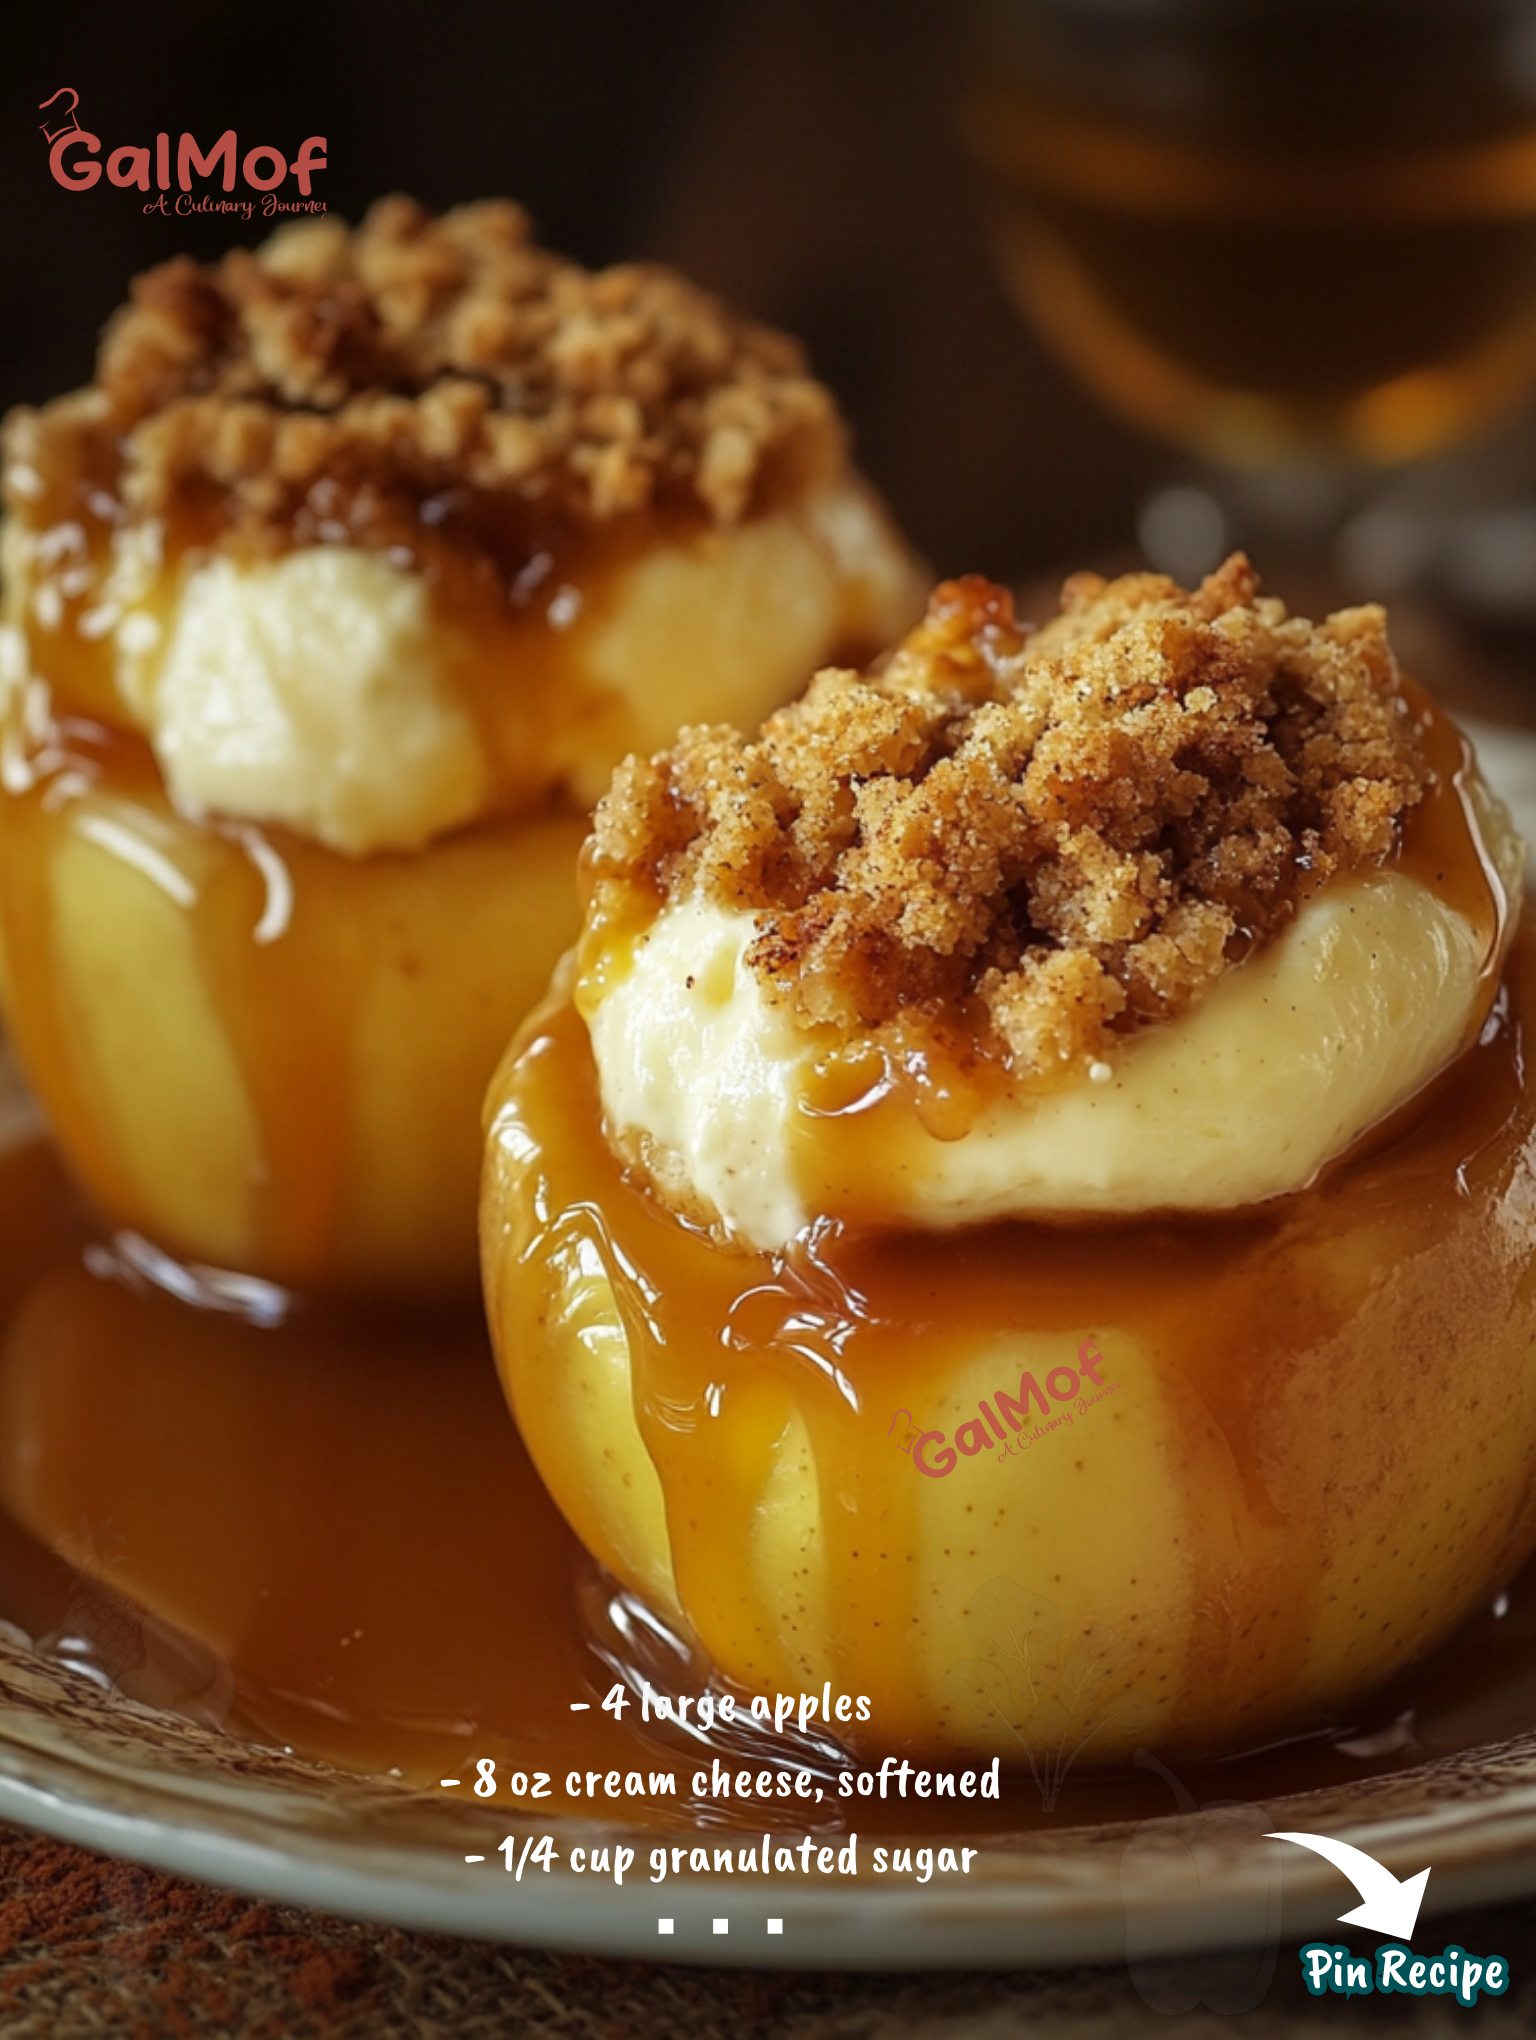
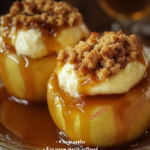
Cheesecake Stuffed Baked Apples: The Ultimate Fall Dessert
Are you ready to elevate your dessert game this autumn? Look no further than our irresistible Cheesecake Stuffed Baked Apples! This mouthwatering treat combines the best of two worlds: the comforting warmth of baked apples and the indulgent creaminess of cheesecake. It’s a match made in dessert heaven that will have your taste buds dancing with joy.
Why You’ll Love This Recipe
- Perfect Fall Flavors: The combination of juicy apples and creamy cheesecake captures the essence of autumn in every bite.
- Impressive Presentation: These stuffed apples look as good as they taste, making them perfect for dinner parties or special occasions.
- Customizable: Choose your favorite apple variety and experiment with different toppings to make this recipe your own.
- Healthier Indulgence: By using whole apples, you’re getting a serving of fruit along with your dessert!
- Easy to Make: Despite its gourmet appearance, this recipe is surprisingly simple to prepare.
Ingredients You’ll Need
- 4 large apples (Honeycrisp, Granny Smith, or your favorite variety)
- 8 oz cream cheese, softened
- 1/4 cup granulated sugar
- 1 egg
- 1 teaspoon vanilla extract
- 1/2 teaspoon ground cinnamon
- 1/4 cup graham cracker crumbs
- 1 tablespoon melted butter
- Optional: caramel sauce or whipped cream for topping
Step-by-Step Instructions
- Preheat Your Oven
Begin by preheating your oven to 350°F (175°C). This ensures that your oven is at the perfect temperature when you’re ready to bake your stuffed apples.
- Prepare the Apples
Selecting the right apples is crucial for this recipe. Honeycrisp apples offer a sweet-tart flavor and hold their shape well when baked. Granny Smith apples provide a tartness that beautifully contrasts with the sweet cheesecake filling. Whatever variety you choose, make sure they’re fresh and firm.
To prepare the apples:
- Wash and dry the apples thoroughly.
- Carefully slice off the top of each apple, about 1/4 inch from the stem end.
- Using a melon baller or small spoon, scoop out the core, creating a hollow center for the cheesecake filling.
- Be careful not to puncture the bottom of the apple – you want to create a “bowl” to hold the filling.
Pro Tip: Save the apple tops! You can chop them up and add them to your morning oatmeal or yogurt for a zero-waste approach.
- Make the Cheesecake Filling
The cheesecake filling is where the magic happens. It’s creamy, sweet, and perfectly spiced to complement the apples.
In a medium bowl, combine:
- 8 oz softened cream cheese
- 1/4 cup granulated sugar
- 1 egg
- 1 teaspoon vanilla extract
- 1/2 teaspoon ground cinnamon
Beat these ingredients together until smooth and creamy. You can use an electric mixer for this step, or mix by hand if you prefer. The goal is to achieve a silky-smooth consistency without any lumps.
- Fill the Apples
Now comes the fun part – filling your prepared apples with the luscious cheesecake mixture.
- Place your hollowed-out apples in a baking dish.
- Using a spoon, carefully fill each apple with the cheesecake mixture.
- Fill them right to the top, but be careful not to overfill – the cheesecake will puff up slightly as it bakes.
- Make the Crumble Topping
The graham cracker crumble adds a delightful crunch and an extra layer of flavor to your stuffed apples.
In a small bowl, mix:
- 1/4 cup graham cracker crumbs
- 1 tablespoon melted butter
Stir until the mixture resembles wet sand. This crumble will create a beautiful golden-brown crust on top of your cheesecake filling.
- Add the Topping
Sprinkle the graham cracker crumble evenly over the cheesecake filling in each apple. Don’t press it down – you want it to remain light and crumbly.
- Bake to Perfection
Place your baking dish with the stuffed apples into your preheated oven. Bake for 25-30 minutes, or until the apples are tender and the cheesecake filling is set.
You’ll know they’re done when:
- The apples are soft enough to pierce easily with a fork
- The cheesecake filling is set but still slightly jiggly in the center
- The graham cracker topping is golden brown
- Cool and Serve
Once baked, remove the apples from the oven and let them cool for about 10 minutes. This cooling period allows the cheesecake filling to set further and makes the apples easier to handle.
Serve your Cheesecake Stuffed Baked Apples warm, and if desired, add a final touch of indulgence:
- Drizzle with warm caramel sauce
- Add a dollop of whipped cream
- Sprinkle with additional cinnamon or nutmeg
Nutritional Information
Per serving (1 stuffed apple):
- Calories: 350
- Total Fat: 22g
- Saturated Fat: 13g
- Cholesterol: 95mg
- Sodium: 220mg
- Total Carbohydrates: 35g
- Dietary Fiber: 4g
- Sugars: 28g
- Protein: 6g
Please note that nutritional values may vary depending on the size of your apples and any additional toppings.
Tips for the Perfect Cheesecake Stuffed Baked Apples
- Choose the Right Apples: While we recommend Honeycrisp or Granny Smith, feel free to experiment with different varieties. Just make sure they’re firm enough to hold their shape when baked.
- Room Temperature Ingredients: Ensure your cream cheese is at room temperature before mixing. This will help you achieve a smooth, lump-free filling.
- Don’t Overmix: When preparing the cheesecake filling, mix just until the ingredients are combined. Overmixing can lead to a dense, heavy texture.
- Prevent Browning: If you’re preparing the apples in advance, brush the cut surfaces with lemon juice to prevent browning.
- Check for Doneness: Every oven is different, so start checking your apples at the 25-minute mark. They’re done when the apples are tender and the filling is set but still slightly jiggly.
- Make it Ahead: You can prepare the stuffed apples up to a day in advance. Just cover and refrigerate, then bake when you’re ready to serve.
- Serving Suggestions: While these apples are delicious on their own, try serving them with a scoop of vanilla ice cream for an extra special treat.
Variations to Try
- Nutty Delight: Add chopped pecans or walnuts to your graham cracker topping for extra crunch.
- Chocolate Lover’s Dream: Mix mini chocolate chips into your cheesecake filling for a chocolatey twist.
- Salted Caramel: Drizzle with salted caramel sauce instead of regular caramel for a sophisticated flavor profile.
- Fruit Fusion: Add a tablespoon of raspberry or strawberry preserves to the bottom of each apple before filling with cheesecake for a fruity surprise.
- Pumpkin Spice: Replace 1/4 cup of the cream cheese with pumpkin puree and add pumpkin pie spice for a fall-inspired variation.
Cheesecake Stuffed Baked Apples
- Total Time: 40-45 minutes
- Yield: 4 stuffed apples 1x
- Diet: Vegetarian
Description
These Cheesecake Stuffed Baked Apples are the ultimate fall treat. Juicy apples are hollowed out and filled with a rich, creamy cheesecake filling, then topped with a crunchy graham cracker crumble. Perfect for cozy nights in or special occasions.
Ingredients
- 4 large apples (Honeycrisp, Granny Smith, or your favorite variety)
- 8 oz cream cheese, softened
- 1/4 cup granulated sugar
- 1 egg
- 1 teaspoon vanilla extract
- 1/2 teaspoon ground cinnamon
- 1/4 cup graham cracker crumbs
- 1 tablespoon melted butter
- Optional: caramel sauce or whipped cream for topping
Instructions
- Preheat Oven: Preheat your oven to 350°F (175°C).
- Prepare Apples: Wash and dry apples. Cut off the top and hollow out the center using a melon baller or small spoon.
- Make Cheesecake Filling: Mix softened cream cheese, sugar, egg, vanilla extract, and cinnamon until smooth.
- Fill Apples: Place hollowed apples in a baking dish and fill with cheesecake mixture.
- Make Crumble Topping: Mix graham cracker crumbs with melted butter until it resembles wet sand.
- Add Topping: Sprinkle graham cracker crumble over the filled apples.
- Bake: Bake for 25-30 minutes, until apples are tender and cheesecake is set.
- Cool & Serve: Let cool for 10 minutes before serving. Add optional toppings if desired.
Notes
- Apple Varieties: Use firm apples like Honeycrisp or Granny Smith for the best results.
- Make Ahead: You can prepare the apples up to a day in advance. Just refrigerate and bake when ready to serve
- Prep Time: 15 minutes
- Cook Time: 25-30 minutes
- Category: Dessert
- Method: Baking
- Cuisine: American
Nutrition
- Serving Size: 1 stuffed apple
- Calories: 350
- Sugar: 28g
- Sodium: 220mg
- Fat: 22g
- Saturated Fat: 13g
- Unsaturated Fat: 0g
- Trans Fat: 0g
- Carbohydrates: 35g
- Fiber: 4g
- Protein: 6g
- Cholesterol: 95mg
Keywords: Cheesecake Stuffed Baked Apples, Fall Dessert, Apple Recipes, Baked Apples, Cheesecake Dessert
Frequently Asked Questions
What’s the difference between New York style cheesecake and regular cheesecake?
New York style cheesecake is known for its dense, rich, and creamy texture. It typically uses more cream cheese than regular cheesecake and often includes sour cream or heavy cream in the recipe. The result is a cake with a slightly tangy flavor and a smooth, velvety consistency.
Regular cheesecake, on the other hand, can vary in texture and ingredients depending on the recipe. It’s often lighter and fluffier than New York style, and may incorporate other flavors more readily.
In our Cheesecake Stuffed Baked Apples recipe, we’ve opted for a filling that’s inspired by New York style cheesecake, giving you that rich, creamy texture in every bite.
How do you core apples for stuffing?
Coring apples for stuffing is a simple process:
- Start by washing and drying your apples thoroughly.
- Use a sharp knife to cut off the top of the apple, about 1/4 inch from the stem.
- Use a melon baller, small spoon, or apple corer to carefully scoop out the core and seeds, creating a hollow center.
- Be careful not to puncture the bottom of the apple – you want to create a “bowl” to hold your filling.
- If needed, use a small paring knife to neaten up the edges of your apple “bowl”.
Remember, it’s better to start small and gradually increase the size of your hollow as needed. You can always remove more, but you can’t put it back!
How do I core an apple without a corer?
Don’t have an apple corer? No problem! Here are a few methods you can use:
- Melon Baller Method: This is the method we recommend in our recipe. Simply use the melon baller to scoop out the core and seeds in a circular motion.
- Knife Method: Use a sharp paring knife to cut around the core in a circular motion, then use the tip of the knife to carefully remove the core and seeds.
- Spoon Method: After cutting off the top of the apple, use a metal spoon to scoop out the core and seeds. This method works best with softer apple varieties.
- Vegetable Peeler Method: Use the tip of a vegetable peeler to carve out the core in a circular motion. This method requires a bit more patience but can be very effective.
Remember, whichever method you choose, always be careful and take your time to avoid accidents.
What is the best choice for coring apples?
The best tool for coring apples often depends on personal preference and what you have available. However, here are some top choices:
- Apple Corer: This specialized tool is designed specifically for removing apple cores quickly and efficiently. It’s a great choice if you frequently prepare apples.
- Melon Baller: As mentioned in our recipe, a melon baller is versatile and effective. It allows for precise scooping and works well for creating stuffed apples.
- Paring Knife: A sharp paring knife gives you the most control and is great for more intricate work. It’s also a common kitchen tool that most people already own.
- Coring Knife: This is a curved knife designed for removing fruit cores. It’s especially useful for larger quantities of apples.
- Electric Apple Peeler/Corer: If you process large quantities of apples regularly, an electric model can save time and effort.
For our Cheesecake Stuffed Baked Apples recipe, we recommend using a melon baller or small spoon, as these allow you to create a nicely shaped “bowl” for the filling while being tools that most kitchens already have on hand.
Why This Recipe Works
Our Cheesecake Stuffed Baked Apples recipe is a winner for several reasons:
- Perfect Balance of Flavors: The tartness of the apples perfectly complements the rich, creamy cheesecake filling. The graham cracker topping adds a delightful crunch and warmth from the cinnamon.
- Textural Contrast: You get the soft, tender baked apple, the creamy cheesecake filling, and the crisp graham cracker topping all in one bite.
- Portion Control: Each apple is a perfect individual serving, making it easy to control portions and beautiful to present.
- Versatility: This recipe can be easily adapted to suit different tastes or dietary needs. You can use low-fat cream cheese, switch up the apple varieties, or add different spices to make it your own.
- Seasonal Appeal: While delicious year-round, this dessert is particularly appealing in the fall when apples are at their peak and we’re craving cozy, comforting desserts.
- Impressive Presentation: These stuffed apples look like they came from a gourmet bakery, but they’re surprisingly simple to make at home.
Conclusion
Cheesecake Stuffed Baked Apples are the perfect dessert to impress your family and friends this fall season. With their irresistible combination of juicy baked apples and creamy cheesecake filling, topped with a crunchy graham cracker crumble, they’re sure to become a new favorite in your recipe collection.
Whether you’re looking for a cozy night-in treat or a show-stopping dessert for your next dinner party, these stuffed apples deliver on all fronts. They’re relatively easy to make, can be prepared in advance, and offer a delightful twist on classic fall flavors.
So, why not give this recipe a try? Your taste buds will thank you, and your guests will be begging for the recipe. Happy baking!
#BakedApples #CheesecakeLovers #FallDesserts #ComfortFood #DeliciousTreat #HomemadeGoodness #DessertInspo #Foodie #Yummy #FoodStagram #CozyRecipes #AppleDesserts #CheesecakeStuffedApples #AutumnTreats #DessertGoals