
The Simple Magic of Caramel: Why Homemade Reigns Supreme
There are some kitchen creations that feel truly magical, transforming humble ingredients into something rich, complex, and utterly captivating. Homemade caramel sauce is one of them. Take simple granulated sugar, a bit of water, butter, and cream, and through a careful process of heat and alchemy, you get liquid gold – a velvety, deeply flavored sauce that elevates everything it touches.
While store-bought caramel sauce exists, it often pales in comparison to the depth of flavor and luxurious texture of a batch made from scratch. Homemade caramel offers a nuanced balance of sweet, slightly bitter, and buttery notes that you simply can’t replicate with artificial flavors or corn syrup-heavy commercial versions. Plus, there’s an immense satisfaction in watching that sugar transform right before your eyes!
Many people are intimidated by making caramel, picturing burnt sugar disasters or crystallized messes. And yes, it requires your attention, but with a few key techniques and an understanding of the process, it’s surprisingly straightforward. Our classic homemade caramel sauce recipe focuses on the ‘wet’ method, using water to dissolve the sugar initially, which makes the process more forgiving and less prone to immediate burning than the ‘dry’ method.
This recipe yields a sauce with the perfect amber hue, a smooth, pourable consistency when warm, and a rich, decadent flavor that is miles ahead of anything you can buy. It’s incredibly versatile – perfect for drizzling over a scoop of vanilla ice cream, dipping fresh apple slices, swirling into your morning coffee, enhancing a cheesecake, or adding moisture and flavor to baked goods. Once you make your own, you’ll never go back! Get ready to unlock the simple secret to truly glorious caramel sauce.
Understanding the Alchemy: The Ingredients
Making caramel requires just a few pantry staples, but each plays a critical role in creating that signature color, flavor, and texture.
- 1 cup (200g) Granulated Sugar: This is the foundation of our caramel. Plain white granulated sugar is ideal as its purity allows for clean caramelization and color development. Using precise measurements (weight is recommended for consistency, hence the gram equivalent) is important in candy making.
- ¼ cup (60ml) Water: A small amount of water is used in the “wet” caramel method. It helps to dissolve the sugar crystals evenly over lower heat before the mixture gets hot enough to caramelize. This reduces the risk of the sugar burning in spots or crystallizing prematurely compared to just melting sugar dry.
- 6 tablespoons (85g) Unsalted Butter, cut into pieces, room temperature: Butter adds richness, smoothness, and contributes to the classic caramel flavor. Cutting it into pieces helps it melt faster and incorporate smoothly. Crucially, it must be at room temperature. Adding cold butter to hot caramel will cause it to seize up and potentially splatter violently. Unsalted butter is preferred so you can control the salt level yourself; if using salted, adjust the added salt later.
- ½ cup (120ml) Heavy Cream, room temperature: Heavy cream (sometimes called heavy whipping cream) is essential for turning the caramelized sugar into a rich, creamy sauce. The high fat content of heavy cream (36%+) is key to achieving a smooth, velvety texture and prevents the sauce from becoming grainy or separating. Like the butter, the cream must be at room temperature. Adding cold cream to hot caramel will cause it to seize dramatically and can create a hard, candy-like mass that is difficult to smooth out.
- 1 teaspoon Pure Vanilla Extract: Added at the end, vanilla extract enhances and rounds out the caramel flavor, adding warmth and complexity. Use pure vanilla extract for the best taste.
- ½ teaspoon Fine Sea Salt (or ¼ teaspoon if using salted butter): Salt is a flavor enhancer that brilliantly contrasts with and balances the sweetness of the caramel. The amount listed provides a classic balance, making the caramel sweet but not cloying. Using fine sea salt ensures it dissolves easily. If you prefer a salted caramel sauce, you’ll increase this amount (see Variations).
The Art of Transformation: Step-by-Step Instructions
Making caramel is a process that requires your full attention, but the steps are simple once you understand them. Read through the entire instructions before you begin.
Preparation is Key (Part 1)
- Gather and Measure Everything: Before you even turn on the heat, measure out all of your ingredients – the sugar, water, butter (cut into pieces), heavy cream, vanilla extract, and salt. Have them ready and close to your stovetop. Once the sugar starts changing color, the process moves very quickly, and you won’t have time to stop and measure things.
- Ensure Room Temperature: Take the butter and heavy cream out of the refrigerator at least 30-60 minutes before you plan to start. They must be at room temperature (around 68-72°F or 20-22°C). This is critical to prevent the caramel from seizing (hardening) and splattering violently when you add them to the hot sugar.
Making the Caramel Base (Part 2)
- Combine Sugar and Water: In a heavy-bottomed medium saucepan, combine the measured granulated sugar and water. A heavy-bottomed pan (like stainless steel or enameled cast iron) distributes heat more evenly, reducing the risk of hot spots and burning. A light-colored interior is helpful for monitoring the color change of the caramel. Stir gently with a wooden spoon or heat-resistant silicone spatula until all the sugar is moistened and resembles wet sand.
- Heat Without Stirring: Place the saucepan over medium heat. Allow the mixture to come to a boil and cook without stirring. This is important: Once the mixture begins to heat and boil, do not stir it. Stirring can introduce stray sugar crystals from the sides of the pan back into the syrup, which can cause the entire mixture to crystallize (turn into a solid, grainy mass) instead of caramelizing smoothly.
- Swirl Occasionally (Optional but Helpful): As the sugar mixture cooks, you can gently swirl the pan occasionally to help the sugar cook evenly. Just pick up the pan by the handle and gently tilt and swirl. This is a safe alternative to stirring.
- Watch the Color Change: The sugar mixture will first dissolve, become clear, and start bubbling (around 3-4 minutes). Continue cooking. Then, it will start changing color, usually around the edges first (approximately 8-10 minutes total cooking time, but timing varies based on your stove and pan). Watch this color change carefully!
- It will go from clear to pale yellow.
- Then to a light amber (like a light beer).
- Finally, to a beautiful, rich, medium amber color (similar to maple syrup or an old penny). This is the sweet spot for classic caramel flavor – deep enough for complexity but not so dark that it tastes burnt.
Adding the Butter and Cream (The Reaction!) (Part 3)
- Remove from Heat & Add Butter: This is the most dramatic step! As soon as the caramel reaches that perfect medium amber color (be brave but don’t let it get too dark!), immediately remove the pan from the heat. Quickly add all the room-temperature butter pieces at once into the hot caramel.
- Whisk in Butter: Immediately begin whisking vigorously. The mixture will bubble up intensely and steam as the butter melts and incorporates. Be careful, as the bubbling caramel is extremely hot! Whisk until the butter is completely melted and the mixture is smooth.
- Slowly Pour in Cream: While continuing to whisk, slowly and gradually pour in the room-temperature heavy cream. Pouring slowly helps manage the reaction. Again, the mixture will bubble and steam significantly as the cream hits the hot caramel. Continue whisking constantly until the cream is fully incorporated and the sauce is smooth and uniform. If it looks a little separated or clumpy at first, keep whisking; it should come together.
- Add Vanilla and Salt: Once the butter and cream are fully incorporated and the sauce is smooth, stir in the vanilla extract and the salt (½ teaspoon or ¼ teaspoon depending on your butter). Mix until combined.
Finishing and Storage (Part 4)
- Cool Slightly in Pan: Allow the finished caramel sauce to cool in the saucepan for about 5 minutes. This lets the initial intense heat subside before transferring.
- Transfer to Container: Carefully pour the still-warm caramel sauce into a heat-proof storage container. A glass jar with a lid is perfect. A funnel can be helpful for pouring into jars.
- Cool Completely: Let the caramel cool completely at room temperature before putting the lid on the jar. Covering it while hot can trap steam and create condensation, which could introduce moisture and potentially cause crystallization. As the caramel cools, it will thicken considerably to its final, pourable sauce consistency.
- Store: Once completely cool, seal the jar tightly with a lid. Store your homemade caramel sauce in an airtight container in the refrigerator. It will last for up to 1 month.
Troubleshooting & Pro Tips for Caramel Success
Caramel can be finicky, but most common issues can be avoided or fixed with the right knowledge.
- Preventing Crystallization:
- Don’t Stir: The most important rule once the sugar starts cooking.
- Clean Pan: Start with a perfectly clean saucepan.
- Wet Brush: If you see any sugar crystals forming on the sides of the pan above the liquid level, dip a pastry brush in clean water and gently brush down the sides of the pan. The water will evaporate as the sugar cooks, dissolving the crystals.
- Avoid Drafts: Cooking near an open window or fan can sometimes cause sugar crystals to form.
- Avoiding Seizing: This happens when you add cold ingredients to hot caramel. Always use room-temperature butter and heavy cream! If your caramel does seize and turn into a hard lump after adding the dairy, don’t despair entirely. Return the pan to very low heat and gently whisk, or place the pan in a warm water bath and whisk. Adding a tablespoon or two of extra warm cream and whisking continuously can sometimes help it smooth out, although it takes patience.
- Watching the Color: The color is the most important indicator! It goes from clear to pale yellow to light amber to medium amber (ideal) to dark amber (nutty, slightly bitter) to burnt (inedible). The color can change very quickly at the later stages, so do not walk away from the pan once it turns yellow. If you have a candy thermometer, aiming for around 350°F (175°C) is the target temperature for medium amber, but visual cues are often more reliable than a thermometer that isn’t perfectly calibrated or placed.
- Safety First: Melting sugar is extremely hot! Be incredibly careful when making and handling caramel. Keep kids and pets away from the stovetop. Be prepared for bubbling and steaming when adding butter and cream, and keep your face and hands back. If you get hot caramel on your skin, run it under cold water immediately.
- Adjusting Cooled Consistency: If your caramel is too thick after cooling, spoon out the amount you need and place it in a microwave-safe bowl or small saucepan. Gently warm it (microwave in 15-second bursts, stirring, or over very low heat on the stove) and whisk in 1-2 warm tablespoons of extra heavy cream until it reaches your desired pourable consistency. If it’s too thin, return the sauce to a saucepan and gently simmer over low heat for a few minutes to reduce some of the liquid, stirring occasionally, then cool again.
- Using a Candy Thermometer: While visual cues are sufficient for many, a candy thermometer can provide an extra layer of confidence. Clip it to the side of the pan, ensuring the bulb is fully submerged in the sugar mixture but not touching the bottom of the pan. Watch for the color as it approaches 350°F (175°C).
The Many Lives of Caramel Sauce: Serving Suggestions
Once you have a batch of this luscious homemade caramel sauce, the possibilities are nearly endless!
Classic Pairings:
- Ice Cream: The absolute best! Drizzle warm or cool caramel sauce generously over vanilla, coffee, or even chocolate ice cream.
- Apple Desserts: A match made in heaven. Drizzle over apple pie, apple crisp, baked apples, or use it as a dipping sauce for fresh apple slices (Granny Smith or Honeycrisp are great for dipping).
- Cheesecake: Spoon warm caramel over slices of plain or flavored cheesecake. Works beautifully with our No-Bake Cookie Butter Cheesecake Cups!
- Puddings & Bread Pudding: Elevate simple desserts like bread pudding, rice pudding, or panna cotta with a warm caramel drizzle.
- Cakes & Brownies: Use as a filling between cake layers, pour warm over a bundt cake, or swirl into brownie batter before baking for gooey caramel brownies.
Creative Uses:
- Coffee & Hot Drinks: Stir a teaspoon or two into your morning coffee, latte, or hot chocolate for a rich caramel flavor. Use it to make a caramel macchiato or caramel latte at home.
- Milkshakes & Smoothies: Blend a tablespoon or two into vanilla milkshakes or even fruit smoothies for an indulgent twist.
- Frosting & Glazes: Mix cooled caramel sauce into buttercream frosting for a caramel frosting, or thin it slightly to create a quick caramel glaze for cakes or pastries.
- Sundaes & Parfaits: Layer caramel sauce with ice cream, whipped cream, nuts, and other toppings for epic sundaes or parfaits.
- Sweet & Salty Snacks: Drizzle over popcorn, pretzels, or even potato chips for a delicious sweet and salty treat.
- As a Dip: Beyond apples, try dipping pear slices, banana chunks, or even sturdy cookies into warm caramel sauce.
- In Breakfast Foods: Drizzle over pancakes, waffles, or French toast. Swirl into oatmeal or yogurt.
Serve warm for a pourable, gooey consistency, or cool for a thicker, more spoonable texture. Gently warming in the microwave or a double boiler is the best way to get that perfect drizzle consistency from stored caramel.
Keeping Your Liquid Gold: Storage
Proper storage ensures your homemade caramel sauce stays delicious and ready to use.
- Refrigerator Storage: Store completely cooled caramel sauce in a clean, airtight container (a glass jar is recommended) in the refrigerator. Stored correctly, it will last for up to 1 month.
- Freezing: Caramel sauce can generally be frozen. Pour cooled sauce into a freezer-safe container or heavy-duty freezer bag, leaving some headspace as liquids can expand slightly when frozen. Freeze for up to 3 months. Thaw in the refrigerator overnight or gently warm from frozen over very low heat or in a microwave (stirring frequently). Note that the texture might change slightly after freezing and thawing, sometimes becoming a little grainier, but the flavor will still be good.
- Reheating: To reheat chilled or frozen caramel, the best methods are:
- Microwave: Spoon the amount you need into a microwave-safe bowl. Heat in 15-30 second intervals, stirring well after each, until it reaches your desired consistency. Be careful not to overheat.
- Stovetop (Double Boiler): Place the jar or a bowl containing the caramel over a saucepan of simmering water (ensure the bottom of the jar/bowl doesn’t touch the water). Stir occasionally until melted and smooth.
- Stovetop (Direct – Use Caution): For larger amounts, you can gently reheat directly in a saucepan over very low heat, stirring constantly. Watch carefully to prevent burning.
Always ensure the caramel is thoroughly stirred after reheating to regain its smooth consistency.
Flavor Explorations: Delicious Variations
Once you’ve mastered the classic, try these simple variations to add new dimensions to your homemade caramel sauce!
- Salted Caramel Sauce: The most popular variation! Increase the amount of fine sea salt added at the end to 1 teaspoon (or even 1 ¼ teaspoons if you like it extra salty, tasting as you go). Alternatively, make the classic sauce as written and sprinkle a few flakes of flaky sea salt (like Maldon) over whatever you are serving it on top of for bursts of salty crunch.
- Bourbon Caramel Sauce: Add 2 tablespoons of your favorite bourbon (or other whiskey) along with the vanilla extract at the very end of the process (after adding cream). Stir until incorporated. Be careful, as the alcohol can cause it to bubble/steam intensely for a moment. The alcohol flavor mellows slightly as it sits, leaving a lovely warmth and depth.
- Spiced Caramel Sauce: Add ¼ teaspoon ground cinnamon, a tiny pinch of ground nutmeg, and a tiny pinch of ground cloves (or pumpkin pie spice mix) along with the vanilla extract. This gives the caramel a warm, autumnal flavor profile perfect for apple desserts or pumpkin-flavored treats.
- Chocolate Caramel Sauce (Gateau Sauce): Whisk in 2 ounces of finely chopped good quality dark chocolate (around 60-70% cocoa content is good) or chocolate chips after adding the heavy cream, while the mixture is still very hot and in the pan off the heat. Continue whisking until the chocolate is completely melted and the sauce is smooth and glossy. This creates a rich, fudgy caramel sauce.
- Coffee Caramel Sauce: Stir in 1-2 teaspoons of instant espresso powder or very strong coffee extract along with the vanilla extract. Perfect for coffee-flavored desserts or adding to coffee drinks.
- Brown Sugar Caramel: While classic caramel uses granulated sugar, you can make a type of caramel (more like a butterscotch sauce) using brown sugar. This yields a deeper, chewier flavor profile. The method is slightly different, often involving melting butter first, then adding brown sugar, boiling, and finally adding cream.

How to Make Flawless Classic Homemade Caramel Sauce?
- Total Time: 1 hour 20 minutes (Includes cooking time + cooling time before storing)
- Yield: 1.5 cups 1x
Description
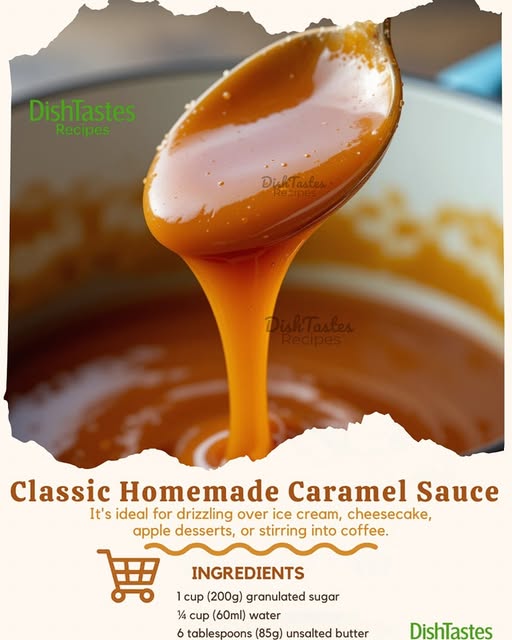
This luxurious caramel sauce has the perfect amber color and smooth, pourable consistency. It’s ideal for drizzling over ice cream, cheesecake, apple desserts, or stirring into coffee. With just a few simple ingredients, you can create this impressive sauce that’s miles better than anything store-bought.
Ingredients
- 1 cup (200g) granulated sugar
- ¼ cup (60ml) water
- 6 tablespoons (85g) unsalted butter, cut into pieces, room temperature
- ½ cup (120ml) heavy cream, room temperature
- 1 teaspoon pure vanilla extract
- ½ teaspoon fine sea salt (or ¼ teaspoon if using salted butter)
- Equipment:
- Heavy-bottomed medium saucepan (light-colored interior works best for seeing color changes)
- Wooden spoon or heat-resistant silicone spatula
- Whisk
- Heat-proof measuring cup for cream
- Glass jar with lid for storage
Instructions
- Preparation:
- Before beginning, have all ingredients measured and ready to use. Once the caramel starts cooking, the process moves quickly.
- Ensure both the butter and cream are at room temperature to prevent splattering and seizing.
- Making the Caramel:
- In a medium heavy-bottomed saucepan, combine sugar and water. Stir gently until sugar is moistened.
- Place over medium heat and allow to cook without stirring. (Important: Do not stir once the mixture begins to heat, as this can cause crystallization.)
- As the mixture heats, you can gently swirl the pan occasionally to ensure even cooking.
- The sugar will first dissolve (approximately 3-4 minutes), then begin to bubble, and finally start changing color (approximately 8-10 minutes total).
- Watch carefully as the color changes from clear to pale yellow, then to a light amber, and finally to a medium amber color (similar to maple syrup).
- Adding Butter and Cream:
- Once the caramel reaches that perfect amber color (around 350°F/175°C if using a candy thermometer), immediately remove the pan from heat.
- Add the butter all at once, and whisk vigorously until completely melted and incorporated. Be careful, as the mixture will bubble up dramatically.
- Slowly pour in the heavy cream while continuing to whisk. Again, be prepared for the mixture to bubble and steam.
- Continue whisking until the sauce is smooth and all ingredients are fully incorporated.
- Stir in the vanilla extract and salt.
- Finishing and Storage:
- Allow the caramel to cool in the pan for about 5 minutes.
- Transfer to a heat-proof container (a glass jar works perfectly).
- Let cool completely before sealing. The sauce will thicken further as it cools.
- Store in an airtight container in the refrigerator for up to 1 month.
Notes
- The color of the caramel is your best indicator for perfect flavor. Aim for a rich amber color, similar to grade B maple syrup.
- Ensure butter and heavy cream are at room temperature to prevent the caramel from seizing when added.
- Avoid stirring the sugar once it begins cooking to prevent crystallization; gently swirling the pan is okay.
- If sugar crystals form on the sides of the pan, brush them down with a wet pastry brush.
- Caramel is extremely hot and can cause serious burns. Use caution when making and handling.
- If your cooled caramel is too thick, gently warm it and whisk in 1-2 tablespoons of warm cream. If too thin, you can simmer it briefly to reduce.
- See the blog post for variations like Salted Caramel or Bourbon Caramel Sauce.
- Prep Time: 5 minutes
- Cook Time: 15-20 minutes (Time on the stove for caramelizing and mixing)
- Category: Sauce, Condiment, Dessert Component
- Method: Stovetop, Caramelize, Whisk
- Cuisine: Classic, Dessert
Keywords: Homemade Caramel Sauce, Caramel Sauce Recipe, Classic Caramel, Easy Caramel, Dessert Sauce, Caramel Topping, Candy Making, Caramel Glaze, Sweet Sauce, Liquid Gold, Stovetop Caramel.
Caramel Wisdom: Answering Your Questions (FAQ)
Making caramel can sometimes lead to questions. Here are answers to common issues:
Q: My caramel turned hard like candy when I added the cream! Why? A: This is called seizing, and it almost always happens because your butter and/or heavy cream were too cold when added to the hot caramel. The sudden temperature difference causes the sugar to seize up. Ensure both dairy components are at room temperature before you start making the caramel. While difficult to fully rescue, you can try gently reheating it over very low heat or in a warm water bath, constantly whisking, and potentially adding a tablespoon or two of warm extra cream, to see if it will smooth out.
Q: My sugar crystalized and turned into a grainy mess. How can I fix it? A: Crystallization usually happens because you stirred the sugar mixture after it started cooking, or stray sugar crystals got into the cooking mixture from the sides of the pan or an unclean spoon. Unfortunately, once the whole batch crystallizes, it’s difficult to fully reverse back into a smooth sauce. You can try adding a little more water, returning it to low heat, and stirring constantly to see if you can get the sugar to re-dissolve, but often it’s better to start over. Prevention (not stirring, brushing down sides, clean pan) is key!
Q: My caramel is too dark and tastes burnt. Can I save it? A: Unfortunately, no. Once sugar is burned, there’s no way to remove that bitter, acrid flavor. Burnt sugar will also harden into a brittle, unusable candy. This happens when the caramel cooks too long or over heat that is too high, especially at the final stages of color change. It’s crucial to watch the color constantly once it turns yellow and remove it from the heat immediately when it reaches the desired amber. If it smells burnt, it’s likely too late.
Q: What kind of pan should I use? A: A heavy-bottomed saucepan is essential. The thick base distributes heat evenly, preventing hot spots that can cause uneven cooking and burning. Stainless steel or enameled cast iron are good choices. A medium size is recommended to give the caramel room to bubble up when adding dairy. A light-colored interior is very helpful for accurately judging the color of the caramel.
Q: Can I use milk or half-and-half instead of heavy cream? A: It is highly recommended to use heavy cream (36%+ fat). Milk or half-and-half have a much lower fat content and higher water content. Using them will result in a thinner, less rich sauce that is more prone to separating or becoming grainy. The fat in heavy cream is crucial for the sauce’s smooth, emulsified texture.
Q: Can I double the recipe? A: Yes, you can double the recipe, but use a larger saucepan to accommodate the increased volume, especially when it bubbles. Be aware that the cooking time (to reach the caramel color) may be longer, and you’ll need to watch the color even more carefully as a larger volume holds heat longer. Ensure your butter and cream amounts are accurately doubled and are at room temperature.
A Sweet Finale
Making Classic Homemade Caramel Sauce is a rewarding endeavor. It might seem daunting at first, but with a little focus and respect for the process, you’ll create a truly spectacular sauce that will become a staple in your kitchen. The rich flavor, the perfect texture, and the sheer versatility make it an indispensable component for countless desserts and drinks.
So, set aside some time, gather your simple ingredients, and prepare to transform sugar into liquid gold. You’ll be so proud of the result!
If you make this Homemade Caramel Sauce, please come back and leave a comment below! Let me know how it turned out and what delicious treats you drizzled it over.
More Treats You’ll Love:
Craving more delicious ways to use your homemade caramel sauce or other sweet treats? Check out these other recipes from Galmof.com:
- Link to Easy Apple Crisp: A warm, comforting dessert that is absolutely divine served with warm caramel sauce drizzled on top.
- Link to Ultimate Chocolate Cake: Caramel and chocolate are a classic pairing! Use your homemade sauce to top slices of this rich chocolate cake.
- Link to No-Bake Strawberry Crunch Cheesecake: Our recipe for these individual cups already calls for a caramel drizzle – use your homemade sauce to make them extra special!
- Link to Kentucky Butter Cake: This moist, buttery cake is the perfect base for a warm caramel sauce glaze or topping.